Retaining Wall & Paver Walkway: Quoting and Running a Project Start to Finish
A full client engagement for Steve, a homeowner in Minneapolis, MN, through my own landscaping business: site visit, design options, estimate, execution, and final invoice.
- Ran the entire client relationship myself through College Bound Landscaping, my own small landscaping business: site visit, design proposal, estimate, execution, and invoicing.
- Scoped the job from a site visit and conversation with the client, then translated his concerns into specific design decisions rather than just executing a generic install.
- Presented two design directions with a clear recommendation, then priced and built the one the client chose.
- Intentionally priced labor low on this job. I treated it as an opportunity to build a real, paid portfolio project and a client relationship, not to maximize margin.
The Client & The Problem
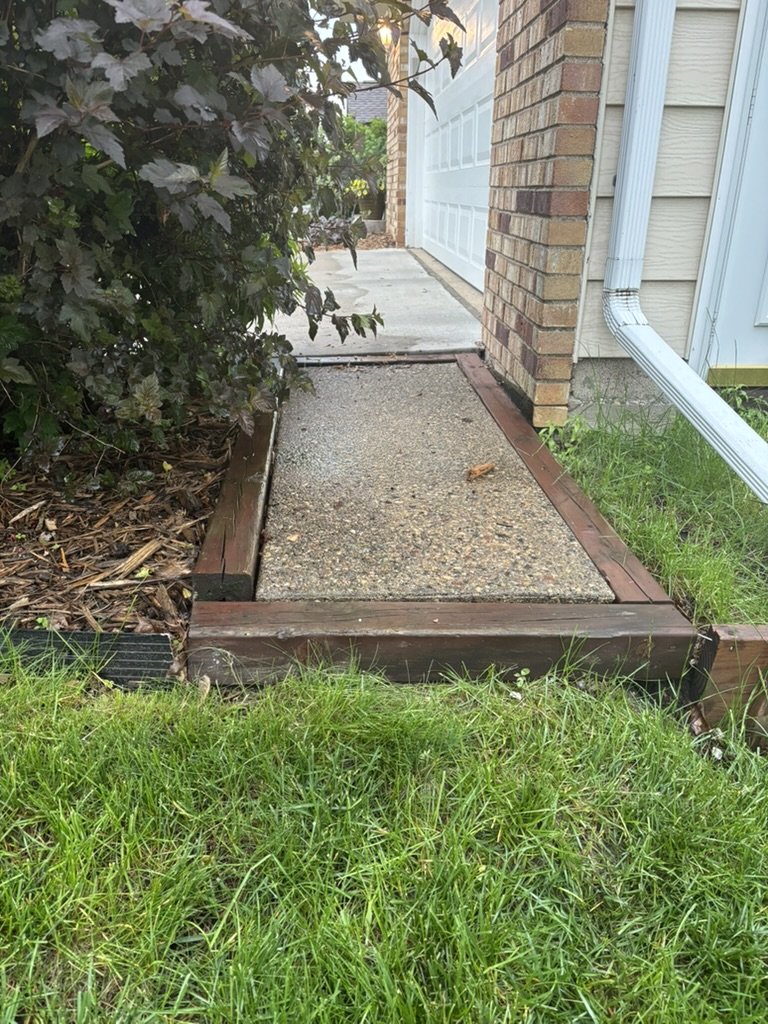
Before: Concrete Slab
The existing surface was just a concrete slab extending from the side of the driveway, boxed in with wood timbers. It didn't connect all the way to the side door, and it was worn down and due for a full rebuild.
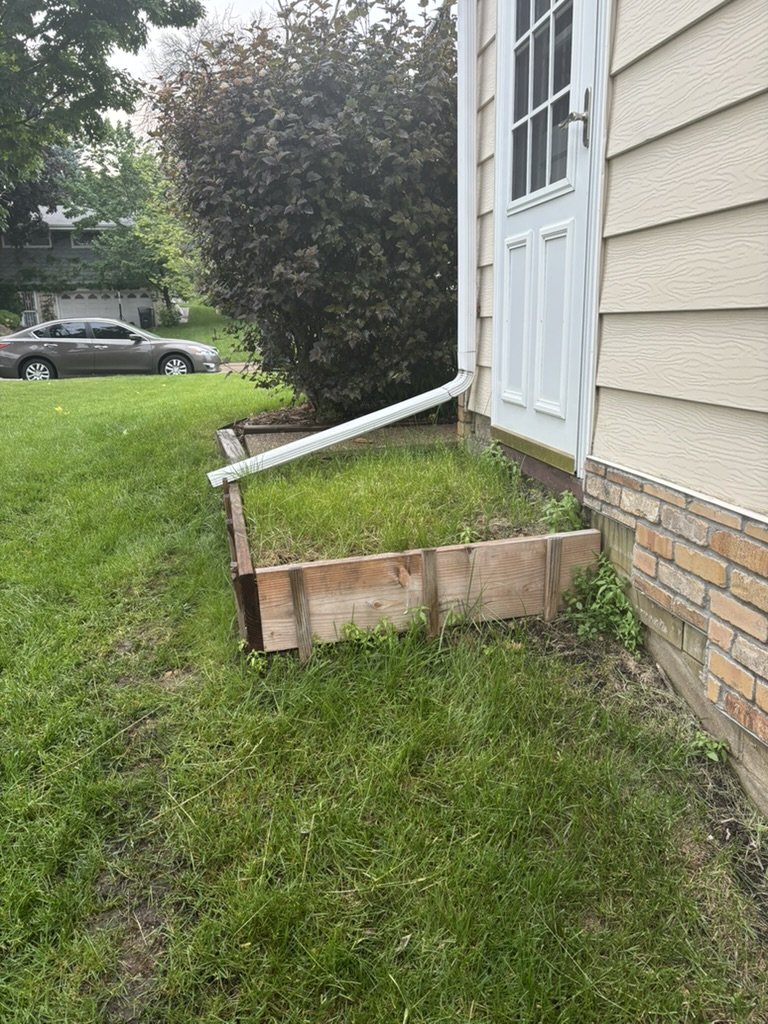
Before: The Old Retaining Box
The previous retaining box was loosely staked into the ground with grass growing inside it. Without a proper base layer underneath, the soil had started to sink, and the mower couldn't reach the corners of the box, so those spots had to be weed whipped instead and it never stayed maintained.
I met the client at the site to walk the space with him and talk through what he wanted. He had two specific concerns going in. First, the old retaining box hadn't been built on a proper base, so it sank and became difficult to maintain, and he didn't want that happening again. Second, he planned to keep his trash cans on the new walkway, and a gutter drain hose running across the pavers would be in the way every time he rolled cans in and out, so the drainage needed to be rerouted underneath the walkway rather than crossing it. I sat down with him after the walk-through to go over both concerns and confirm what he wanted out of the project before I put anything on paper.
Design Options
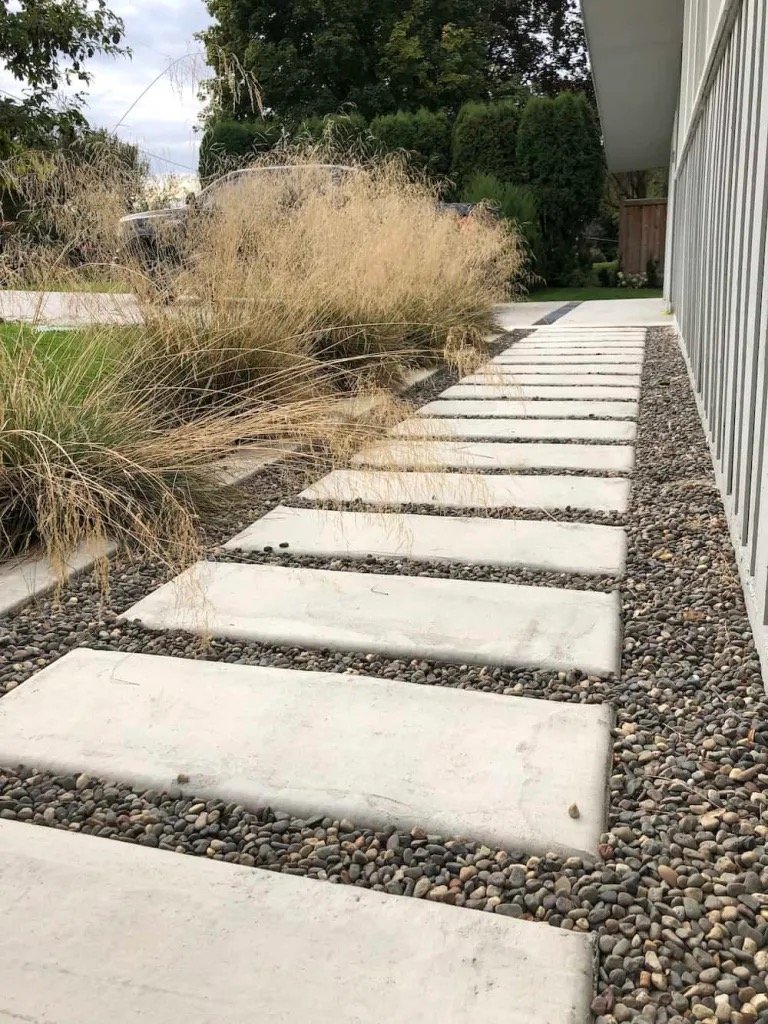
Design Option One: Rock & Large Paver Style
Pros: Quicker and cheaper to install. Fewer cuts and less precise leveling meant less labor.
Cons: Difficult to shovel in the winter, awkward for rolling trash cans over, and the loose rock was likely to get kicked into the driveway over time.
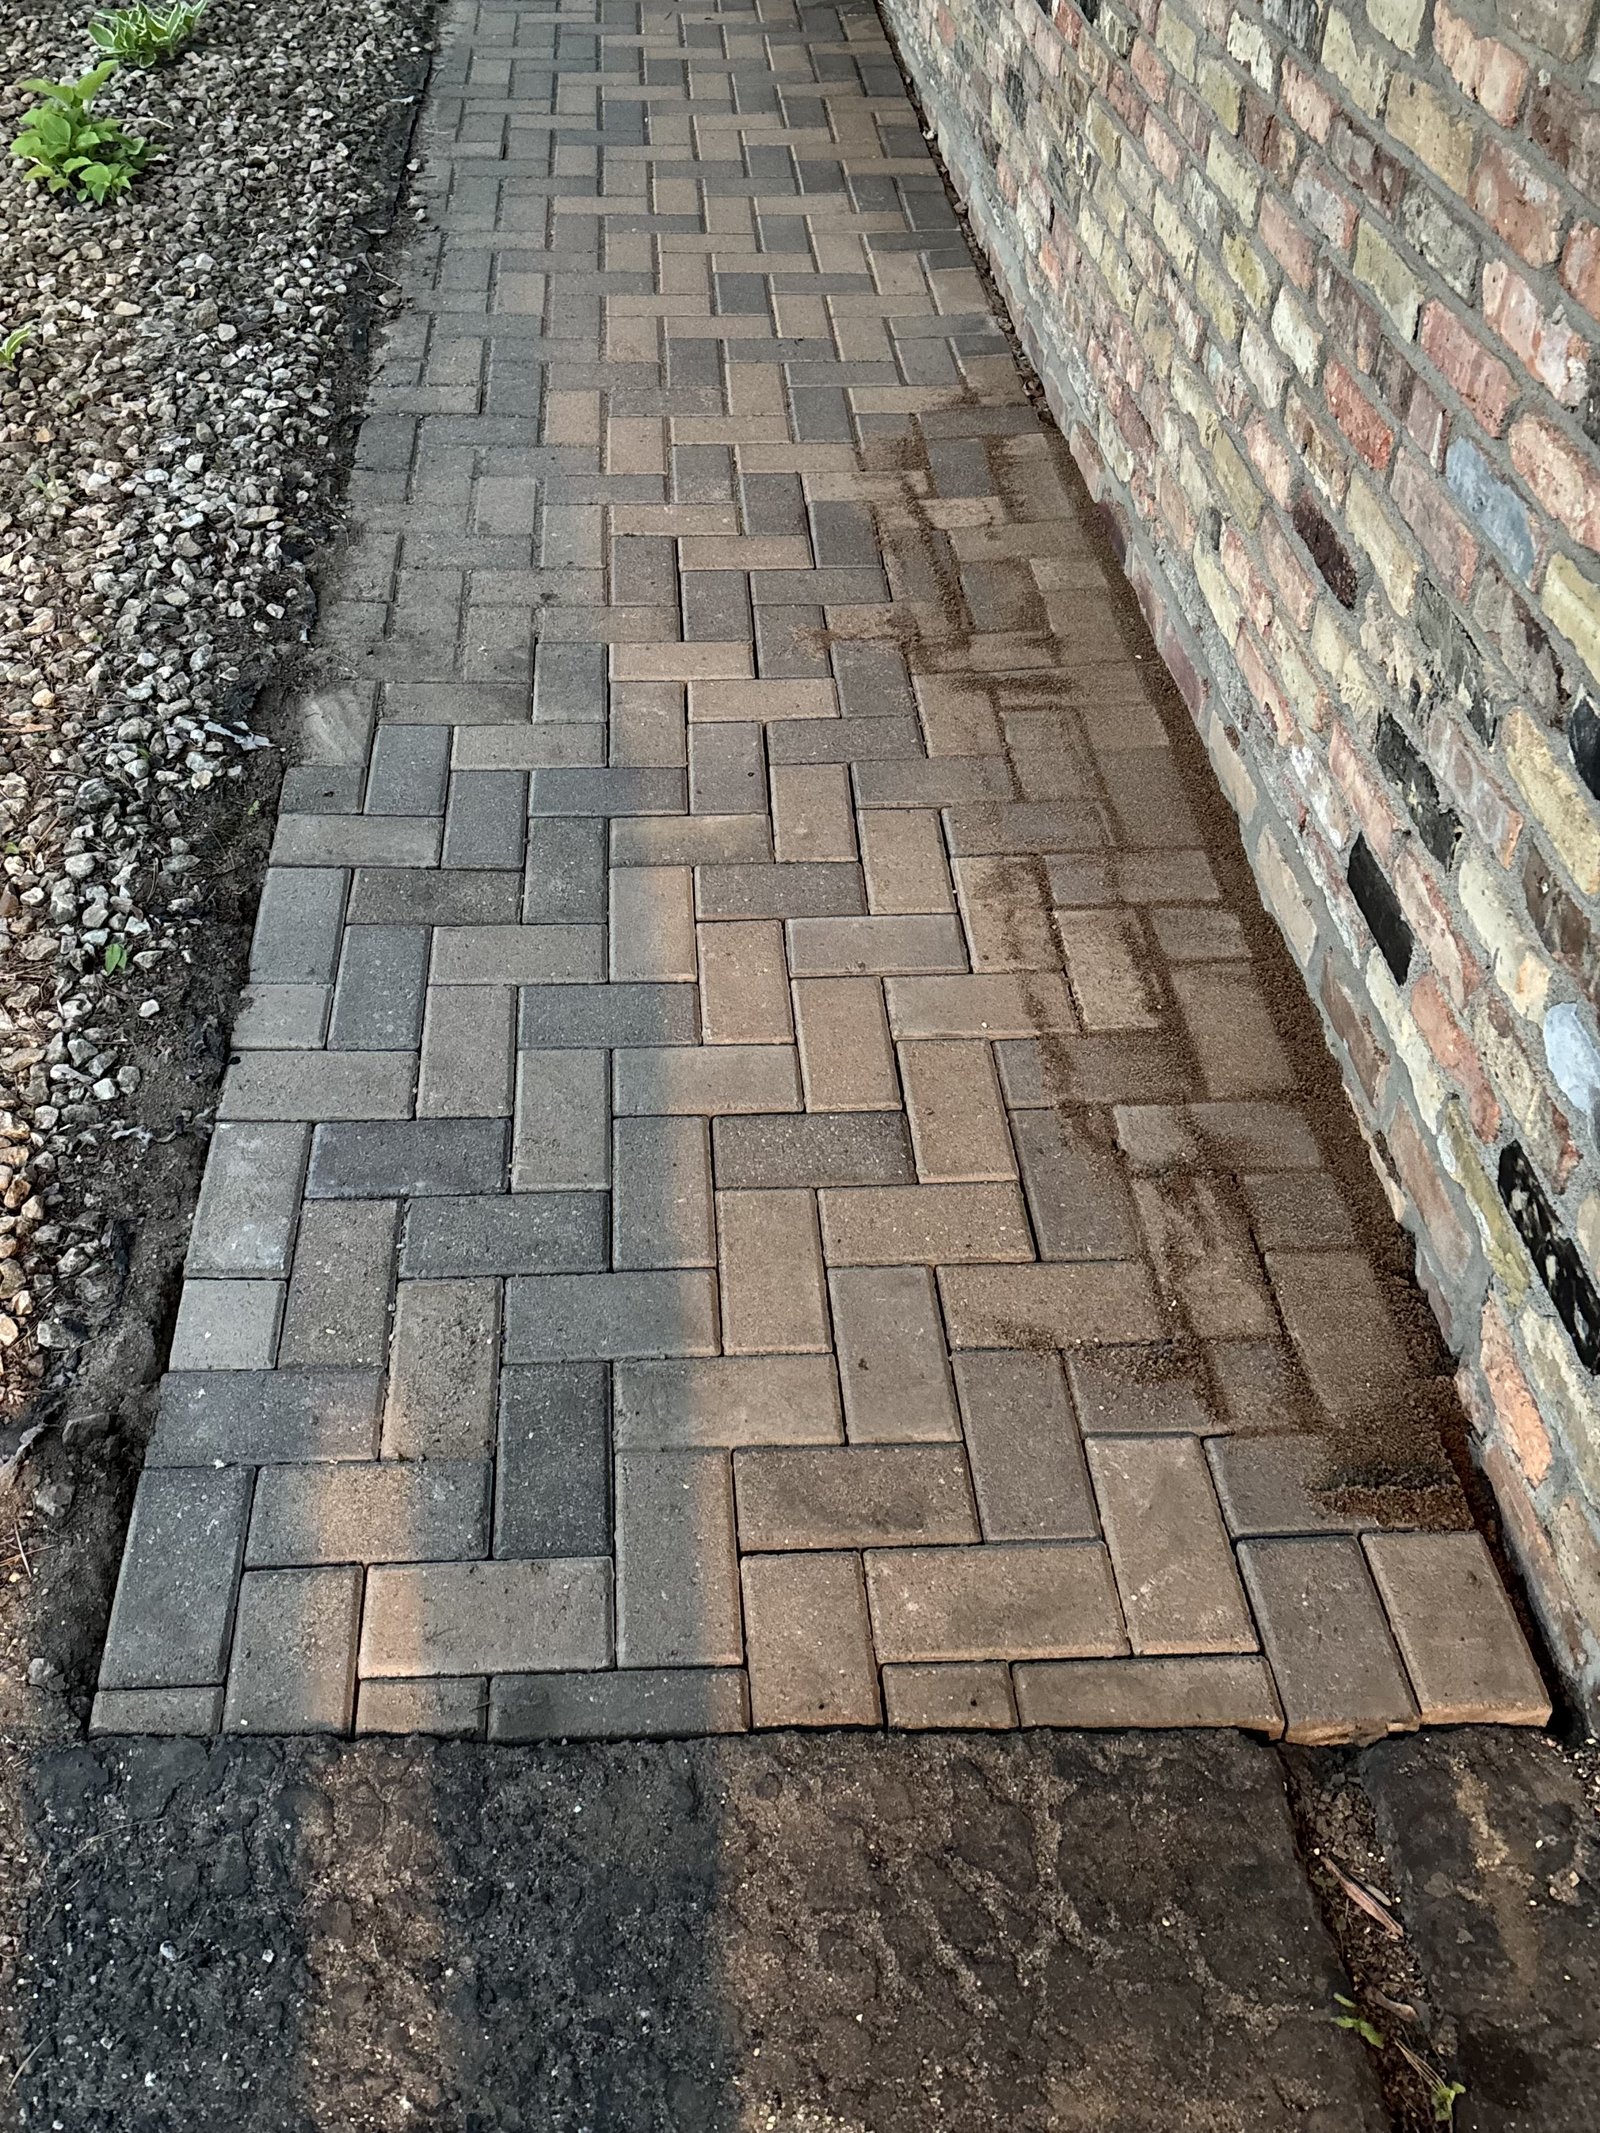
Design Option Two: Traditional Herringbone Brick Pavers
Pros: Easy to shovel and maintain, a solid surface for rolling trash cans over, and water rolls off the top rather than needing to filter through, like it would with rock.
Cons: More labor-intensive to install, with more cuts and more precise leveling required, which meant a higher labor cost than the rock option.
I gave Steve my honest recommendation rather than presenting the two options neutrally: the traditional brick style was the better practical choice given how he planned to use the space, even at a higher labor cost. He agreed and chose the brick direction. Once that was settled, I sent him a few color combinations to choose from before locking in the final design.
Planning the Estimate
I took measurements at the same site visit and used them to calculate the materials the job would actually need: retaining wall blocks, paver bricks, gravel and sand for the base, and drainage tubing to reroute the gutter discharge underneath the walkway. Those quantities became the line-item estimate below, which the client approved before I started any work.
| Material | Quantity | Unit Price | Total |
|---|---|---|---|
| Retaining Wall Blocks | 24 | $5.61 | $134.68 |
| Retaining Wall Caps | 14 | $2.48 | $34.66 |
| Holland Pavers (brick pavers) | 130 | $0.74 | $95.58 |
| Paver Base | 20 | $3.77 | $75.47 |
| Pea Gravel | 10 | $3.77 | $37.74 |
| Leveling Sand | 12 | $3.77 | $45.28 |
| Polymeric Paver Locking Sand | 0.7 | $30.78 | $21.55 |
| 4"x25' Drain Tubing | 1 | $25.38 | $25.38 |
| Paver Restraint | 1 | $12.95 | $12.95 |
| Flex Ground Spout | 1 | $9.40 | $9.40 |
| Total Materials Cost | $492.69 |
A 10% materials discount brought the final materials line on the invoice down to $443.42, reflected in the Estimate vs. Actual comparison further down.
Execution
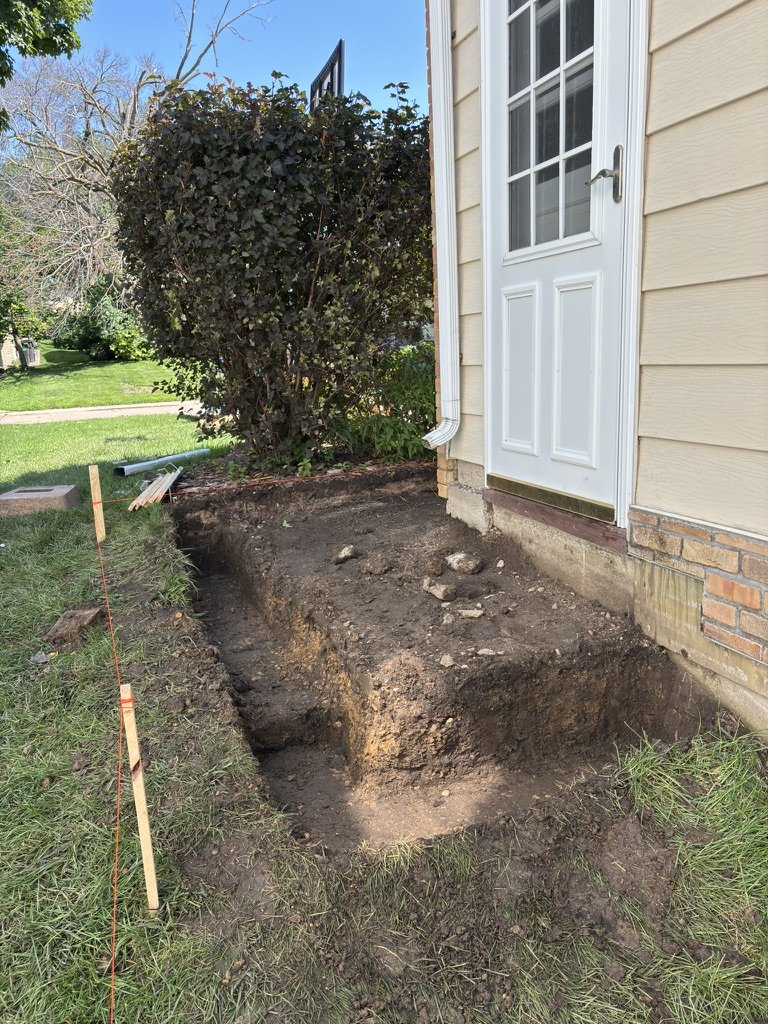
Early Work: Digging to Level
The string line staked out on the left runs off the driveway grade. I used it to calculate the height I needed to build up to, which told me exactly how far to dig down before laying the retaining wall base.
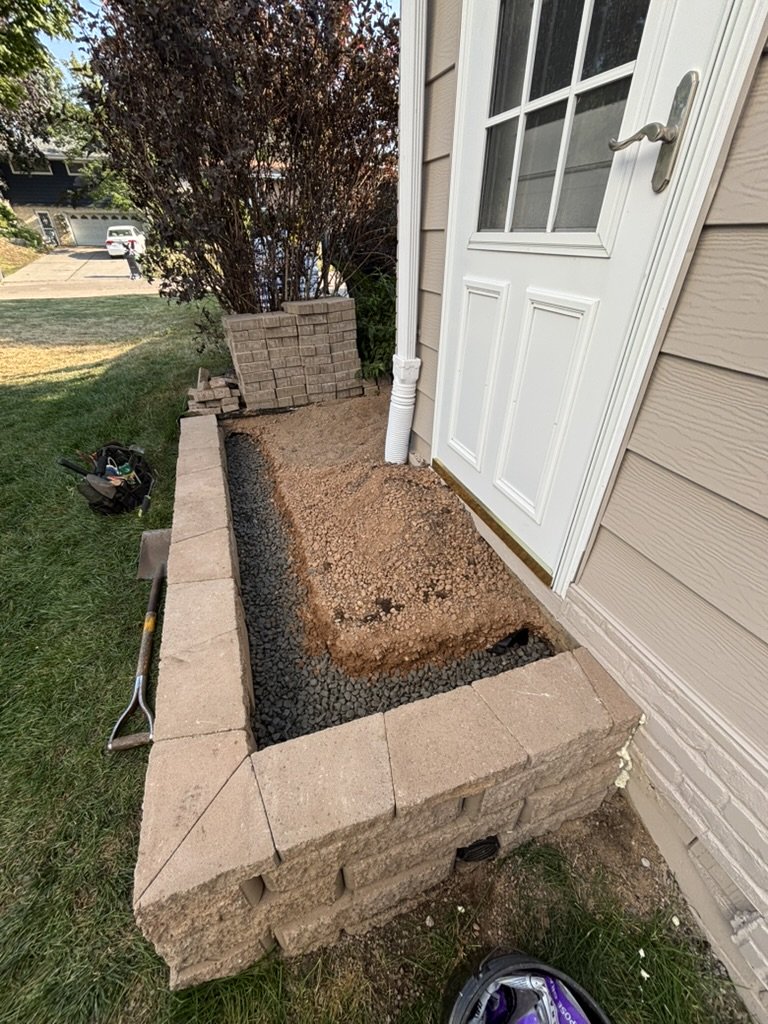
Mid-Build: Base Layer First
Unlike the previous box, I dug the trench down to a proper gravel base before setting the retaining wall blocks, directly addressing the sinking problem the client had raised.
The hardest technical part of the build was making sure the finished paver surface came out level with the top of the retaining wall caps. From that initial string line, it was a matter of continually re-checking level as each course of block and each row of pavers went in, so the final surface came out flat and consistent rather than drifting off level over the length of the walkway.
The Finished Project
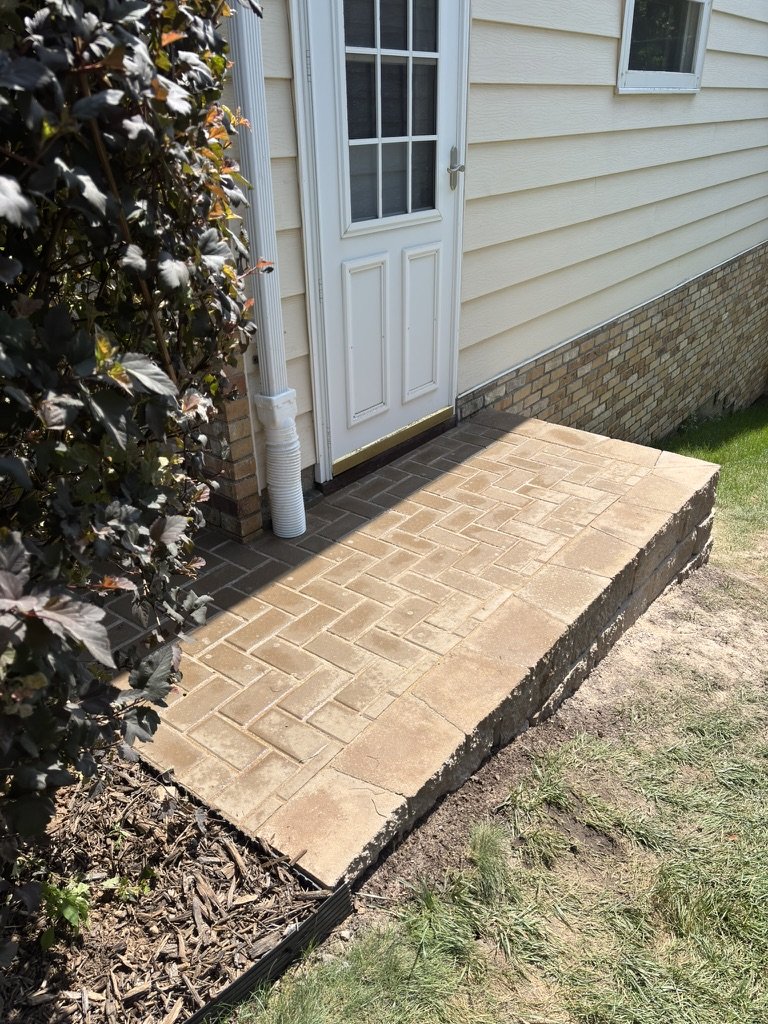
Finished Patio at the Side Door
The paver surface sits flush with the top of the retaining wall caps, the payoff of the leveling work done throughout the build.
Estimate vs. Actual
The final invoice came in about 2% under the original estimate. Materials ended up a bit higher than estimated once I had exact counts of blocks, pavers, and drainage tubing rather than rough quantities, while labor and overall expenses landed a bit lower, keeping the total close to what I'd quoted.
| Estimate | Final Invoice | |
|---|---|---|
| Labor | $950.00 | $875.00 |
| Materials | $290.00 | $443.42 |
| Other Expenses | $75.00 | $80.00 |
| Subtotal | $1,315.00 | $1,398.42 |
| Sales Tax | $112.10 | $0.00 |
| Total | $1,427.10 | $1,398.42 |
The estimate included Minnesota sales tax, and the final invoice didn't. Minnesota's sales tax treatment of landscaping and hardscaping work isn't a flat rule, whether a project is taxable depends on the specific scope of work. Once the job was underway, I looked into the tax code more closely and determined this particular project didn't require sales tax to be collected, which is why it came off the final invoice. It was a good early lesson: on future estimates, I need to research the applicable tax treatment before quoting a number, not after.
On the labor line specifically: I priced it low relative to what I'd normally charge. This was early in the life of my landscaping business, and I treated the job as a chance to do a real, paid project for an actual client and build a portfolio piece, rather than as a job I was trying to maximize profit on. I'm comfortable showing that number because the reasoning behind it, prioritizing experience and a strong finished project over margin, is itself part of the story.
Outcome
This project taught me how much groundwork goes into a good estimate before any digging starts: listening closely enough at the site visit to catch the client's real concerns, translating those concerns into a specific design recommendation instead of a generic install, and pricing the job accurately enough that the final invoice landed within 2% of the original number. It also taught me a concrete lesson about scope: sales tax on landscaping work in Minnesota isn't automatic, and I now know to research that before quoting rather than after. On the execution side, keeping the wall and walkway level over that distance pushed my hands-on skills further than any project I'd done before. The finished result held up to that standard, a clean, level installation the client was happy with, and the whole experience gave me real confidence running a project end to end as the only person responsible for scoping it, pricing it, and delivering it.
← Back to portfolio